Cedar shake roofing offers a durable, rustic, and eco-friendly option for homeowners. Known for their natural beauty and resistance to weather, cedar shakes require precise installation to ensure longevity and protection.
1.1 What Are Cedar Shakes?
Cedar shakes are tapered pieces of natural cedar wood, traditionally used for roofing and siding. They are sawn or split from cedar logs, offering a rustic, durable, and weather-resistant option. Unlike shingles, shakes are thicker and have a more textured, organic appearance. Known for their natural beauty and eco-friendly properties, cedar shakes provide excellent insulation and a classic aesthetic, making them a popular choice for homeowners seeking a sustainable and visually appealing roofing solution. Their natural oil content also enhances durability and resistance to pests and rot.
1.2 Benefits of Cedar Shakes
Cedar shakes offer exceptional durability and natural resistance to weather, pests, and rot. They provide excellent insulation, reducing energy costs and creating a cozy living environment. Their rustic, timeless appeal enhances a home’s aesthetic value. Cedar shakes are also eco-friendly, as they are made from sustainable, renewable resources. Properly installed, they can last for decades, making them a cost-effective choice. Their natural beauty and resilience make cedar shakes a popular option for homeowners seeking a traditional, long-lasting roofing solution that blends seamlessly with nature.
1.3 Importance of Proper Installation
Proper installation of cedar shakes is crucial to ensure their longevity and performance. Improper techniques can lead to premature wear, leaks, and structural damage. Correctly applied underlayment, precise nailing, and proper spacing prevent moisture issues and ensure ventilation. A well-installed roof withstands harsh weather conditions, maintains its aesthetic appeal, and protects the home effectively. Professional installation or adherence to proven methods is essential to maximize the benefits of cedar shakes and avoid costly repairs.

Tools and Materials Needed
Essential tools include a hammer, utility knife, tape measure, and saw. Materials required are cedar shakes, underlayment, battens, nails, and weatherproofing flashing for a secure installation.
2.1 Essential Tools for Installation
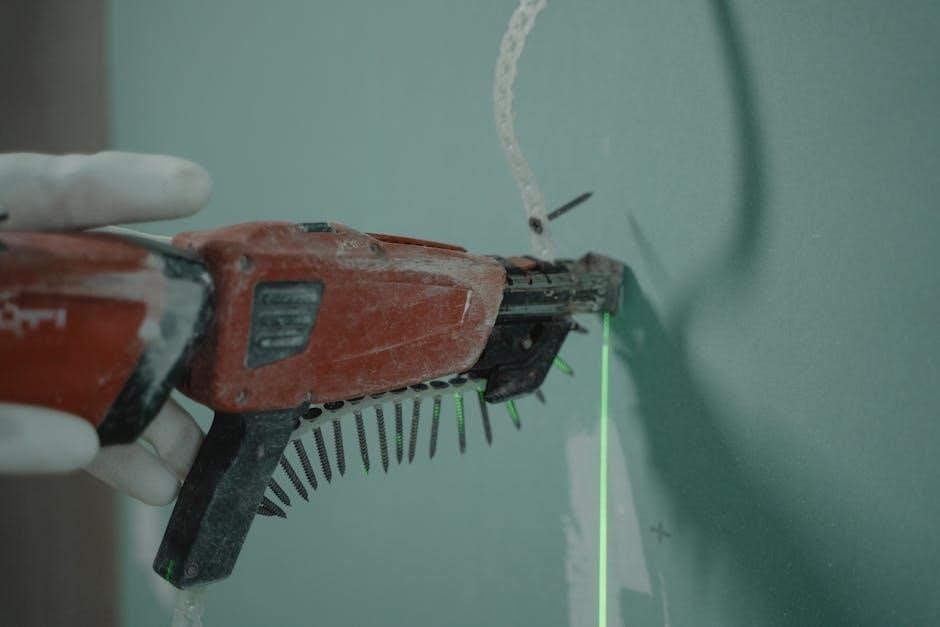
The installation of cedar shakes requires specific tools to ensure accuracy and safety. A hammer, utility knife, tape measure, and circular or handheld saw are essential for cutting shakes. A roofing nailer or hammer or hand nails are necessary for securing shakes. Safety gear, including gloves and a dust mask, protects during cutting and handling. A ladder or scaffolding provides safe access to the roof. Additionally, caulking guns and flashing tools are needed for weatherproofing. Proper tools ensure a professional finish and longevity of the roof.
2.2 Required Materials for Cedar Shake Roofing
Key materials for cedar shake roofing include high-quality cedar shakes or shingles, underlayment for weather protection, and durable roofing nails. A breather membrane is recommended to prevent moisture buildup. Flashing materials are needed for vents, chimneys, and valleys to ensure water tightness. Roofing felt or synthetic underlayment provides an additional layer of protection. Battens or furring strips may be required for proper installation. Safety materials like gloves and masks are essential for handling cedar. Proper materials ensure a weather-tight, long-lasting roof.

Preparation for Installation
Preparation involves site cleanup, safety measures, and inspecting the roof for damages. Remove existing roofing material and ensure the surface is clean and ready for underlayment installation.
3.1 Site Preparation and Safety
Site preparation involves clearing debris and ensuring a stable work environment. Safety measures include wearing protective gear and securing ladders. Proper ventilation and weather checks are essential; Ensure all tools and materials are within reach to avoid accidents. A clean workspace prevents tripping hazards and allows for efficient installation. Additionally, inspect the area for power lines or obstacles that could interfere with the process. Always follow local building codes and manufacturer guidelines for a secure setup.
3.2 Roof Inspection and Damage Assessment
Before installing cedar shakes, inspect the roof for damaged, rotting, or loose material. Check underlayment, battens, and rafters for decay or structural issues. Ensure all flashing is intact and functioning properly. Assess valleys and seams for potential leaks. Document any damage to plan repairs. Verify that the roof deck is secure and even, addressing any warped or uneven areas. Safety is critical; ensure the roof is stable before proceeding with installation. A thorough inspection prevents future issues and ensures a solid foundation for your cedar shake roofing.
3.3 Removing Existing Roofing Material
Removing existing roofing material is essential for a clean cedar shake installation. Start by stripping old shingles, shakes, or other coverings, taking care to protect surrounding surfaces. Use pry bars or shingle removers to lift material without damaging the roof deck. Remove nails and debris thoroughly. Inspect the roof deck for rot or damage, addressing any issues before proceeding. Ensure all flashing and underlayment are evaluated and replaced if necessary. Proper removal ensures a stable base for new cedar shakes and prevents future structural problems. Safety gear, including gloves and goggles, is crucial during this process.
Roofing Underlayment
Roofing underlayment is a protective layer installed beneath cedar shakes to prevent moisture damage and ensure a durable, watertight seal. It is crucial for long-term roof integrity.
4.1 Types of Underlayment Materials
Common underlayment materials for cedar shake roofs include asphalt-saturated felt, synthetic underlayment, and breathable membranes. Asphalt felt is traditional and cost-effective, while synthetic options offer durability and moisture resistance. Breathable membranes enhance ventilation, reducing condensation and extending roof life. Each material has unique benefits, and the choice depends on climate, budget, and specific roofing needs. Proper selection ensures optimal performance and protection for the cedar shakes, promoting a long-lasting and weather-tight roof system. Always follow manufacturer guidelines for installation.
4.2 Installing the Underlayment Correctly
Begin by ensuring the roof deck is clean, dry, and flat. Start installation at the eave, applying underlayment in continuous sheets. Overlap edges by 6 inches and secure with fasteners. Ensure smooth application to avoid wrinkles or air pockets. Follow manufacturer instructions for spacing and nailing patterns. Proper installation prevents water infiltration and ensures a stable base for cedar shakes. Complete the process by wrapping underlayment around roof edges and finishing at the ridge. This step is critical for a durable and weather-tight cedar shake roof system.
Ventilation Requirements
Proper ventilation is essential for cedar shake roofs to prevent moisture buildup. Ensure adequate airflow through soffits, ridges, and vents to maintain structural integrity and prevent rot or mold.
5.1 Why Ventilation is Crucial for Cedar Shakes
Ventilation is vital for cedar shakes to prevent moisture accumulation, which can lead to rot and mold. Proper airflow extends the roof’s lifespan and protects against structural damage. Without adequate ventilation, cedar shakes may warp or crack, compromising the roof’s integrity. Additionally, poor ventilation can lead to increased energy costs and create an environment conducive to pest infestations. Ensuring airflow maintains the natural durability of cedar, preserving its aesthetic and functional benefits over time.
5.2 Installing Ventilation Components
Proper ventilation is achieved by installing components like ridge vents and soffit vents. These ensure airflow from the eaves to the roof’s peak, maintaining a balanced system. Position vents correctly to avoid blocking airflow and follow manufacturer guidelines for installation. Secure vents tightly to prevent leaks and ensure durability. Proper installation prevents moisture buildup, reducing the risk of rot and damage. Regular inspection of ventilation components is essential to maintain their effectiveness and ensure the longevity of the cedar shake roof.
Cutting Cedar Shakes
Cedar shakes are easily cut using circular saws or hand saws due to their softwood nature. Always wear safety gear and ensure proper ventilation during cutting.
6.1 Methods for Cutting Cedar Shakes
Cedar shakes can be cut using circular saws, hand saws, or jigsaws, depending on the desired precision. Circular saws are ideal for straight cuts, while jigsaws are better for curved edges. Always use sharp blades to avoid splintering. Cutting on a stable work surface ensures accuracy and safety. For angled cuts, a miter saw is recommended. Proper measurement and alignment are crucial to achieve clean, professional results. Wearing safety gear, such as gloves and goggles, is essential when cutting cedar shakes.
6.2 Safety Tips for Cutting Cedar Shakes
When cutting cedar shakes, wear protective gear including safety glasses, gloves, and a dust mask. Ensure the work area is well-ventilated to avoid inhaling cedar dust. Keep loose clothing and long hair tied back to prevent accidents. Use a push stick or other safety devices when operating power tools. Always maintain a firm grip on the shake to prevent slipping. Avoid cutting near flammable materials, as cedar dust can be combustible. Regularly inspect tools for sharpness and proper function to minimize risks during the cutting process. Safety should never be compromised when working with power tools and wood materials.

Installing Roof Battens
Roof battens are horizontal strips installed over rafters to support cedar shakes. They ensure proper spacing, drainage, and ventilation, while providing a nailing surface for secure installation.
7.1 Purpose of Roof Battens
Roof battens are essential for cedar shake installation, serving as horizontal supports installed over rafters. They provide a secure nailing surface for shakes, ensuring proper spacing and alignment. Battens also help with drainage by allowing water to run off evenly and prevent shakes from touching each other, which could lead to rot. Additionally, they enhance ventilation by creating airspace between the roofing felt and shakes, reducing moisture buildup. Properly installed battens are crucial for the structural integrity and longevity of the roof, ensuring it withstands weather conditions effectively while maintaining aesthetic appeal.
7.2 Proper Placement and Spacing
Proper placement and spacing of roof battens are critical for a successful cedar shake installation. Battens should be installed horizontally across the rafters, spaced evenly according to the manufacturer’s specifications, typically 16 to 24 inches on-center. This ensures adequate support for the shakes and allows for proper ventilation. Each batten must align with the rafter below it to provide a secure base for nailing. Correct spacing prevents overcrowding of shakes, ensuring they lie flat and drain water effectively. This attention to detail is vital for both functionality and the roof’s appearance.

Cedar Shake Installation Process
The process begins with a starter course, followed by installing field shingles, and layering shakes to ensure a watertight seal. Proper alignment and spacing are key.
8.1 Starting with the Starter Course
The starter course is the first layer of cedar shakes installed along the roof’s edge. It provides a foundation for subsequent courses and ensures a uniform appearance. Properly aligned and secured, the starter course prevents wind-driven rain from penetrating the roof. Each shake in this course should be nailed with two corrosion-resistant nails, spaced evenly to maintain structural integrity. This initial step is crucial for the overall durability and weather resistance of the roof. Adhering to manufacturer guidelines ensures a professional finish and long-lasting performance.
8.2 Installing Field Shingles
Field shingles are installed above the starter course, covering the majority of the roof. Each shingle must be nailed with two corrosion-resistant nails, ensuring they are spaced evenly and aligned properly. Maintain a consistent overlap between courses to prevent water penetration. Stagger joints between courses to avoid leaks and ensure a uniform appearance. Properly securing field shingles is essential for weather resistance and structural integrity. Always follow manufacturer guidelines for specific nailing patterns and spacing to achieve a professional and durable finish.
8.3 Layering Cedar Shakes
Layering cedar shakes ensures a watertight seal and enhances durability. Begin with the starter course, then install field shingles, overlapping each course by at least 1.5 inches. Alternate joints between layers to prevent alignment, minimizing gaps. Each shake should align with the course below, maintaining uniform spacing. Proper layering prevents water infiltration and strengthens the roof structure. Ensure each layer is securely nailed to roof battens, following recommended patterns. Consistent layering promotes even wear and extends the roof’s lifespan, maintaining its aesthetic appeal and functionality.

Nailing Techniques
Use corrosion-resistant nails to secure cedar shakes, ensuring proper spacing and alignment. Nails should penetrate both the shake and roofing batten for maximum strength and durability.
9.1 Choosing the Right Nails
Selecting the correct nails is critical for securing cedar shakes effectively. Use hot-dipped galvanized or stainless steel nails to prevent corrosion and ensure durability. Nails should be 1.5 to 2 inches long with a ring-shank design for better hold. Avoid using nails that are too short, as they may not penetrate the roofing batten properly. Proper nail spacing is essential to prevent splitting the shakes. Always follow manufacturer recommendations for nail type and size to ensure a secure and weather-tight installation.
9.2 Proper Nailing Patterns
Proper nailing patterns are essential for a secure and weather-tight cedar shake roof. Each shake should be nailed with two nails, spaced evenly and located 1 inch from each edge. Nails must be driven straight through the shake and into the roofing batten. Avoid over-tightening, as this can cause splits in the wood. Ensure nails are countersunk slightly to maintain a smooth surface. Follow a consistent nailing pattern across the roof to prevent unevenness and ensure all shakes lie flat, providing optimal protection against the elements. Proper alignment and spacing are key to a durable and attractive roof.
Flashing and Weatherproofing
Flashing is critical for preventing water infiltration at roof intersections and valleys. Proper weatherproofing ensures long-term durability and protection against harsh weather conditions, enhancing your roof’s performance.
10.1 Importance of Flashing
Flashing is essential for sealing gaps around vents, chimneys, and valleys, preventing water leaks. Proper flashing protects the roof’s integrity, ensuring water flows off without damaging the structure. Without it, moisture can infiltrate, causing rot and mold. Flashing materials like metal or rubber are durable and weather-resistant, making them ideal for long-term protection. It is crucial to install flashing correctly to maintain the roof’s functionality and aesthetic appeal.
10.2 Applying Flashing Around Vents and Chimneys
Flashing around vents and chimneys requires precision to prevent leaks. Use high-quality materials like metal or rubber, ensuring they fit snugly. Measure and cut flashing to cover all gaps, then secure it tightly. Apply a watertight sealant around edges for added protection. Follow manufacturer instructions for specific materials. Regularly inspect flashing to maintain its integrity and prevent future issues.

Valleys and Ridges
Valleys and ridges require precise cedar shake installation to ensure smooth water flow and prevent leaks. Secure caps and layered shakes are essential for durability and weatherproofing.
11.1 Installing Cedar Shakes in Valleys
Installing cedar shakes in valleys requires precision to ensure a watertight seal. Start by laying a durable underlayment in the valley area, ensuring it extends beyond the roof edges. Align the first shake tightly along the valley center, overlapping each subsequent shake by at least 2 inches. Secure shakes with corrosion-resistant nails, spaced evenly to avoid splitting the wood. Proper layering and alignment are critical to direct water flow and prevent leaks. Ensure tight fits between shakes for long-lasting durability and weather resistance.
11.2 Securing Ridge Caps
Securing ridge caps is essential for a weatherproof seal at the roof’s peak. Use high-quality cedar shakes or pre-manufactured caps, aligning them tightly along the ridge line. Ensure caps are snug and evenly spaced, nailing them securely with corrosion-resistant nails. Apply a bead of weatherproof sealant along the edges for added protection. Proper installation prevents wind damage and water infiltration, ensuring the roof’s structural integrity and aesthetic appeal. Always follow manufacturer guidelines for optimal results and long-term durability.

Trimming and Finishing
Trimming and finishing involve cutting excess cedar shake material for a clean appearance. Use utility knives or pruning saws for precise cuts, ensuring a neat, professional finish.
12.1 Trimming Excess Cedar Shake Material
Trimming excess cedar shake material ensures a clean, professional finish. Use utility knives or pruning saws for precise cuts; Always cut away from your body for safety. Remove overhanging shakes at valleys, ridges, and eaves. Check for uniformity and alignment. Sand rough edges to prevent splinters. Wear protective gloves and eyewear during trimming. Ensure all cuts align with the roof’s design for a seamless appearance. Proper trimming prevents water infiltration and enhances the roof’s aesthetic appeal. Follow manufacturer guidelines for optimal results.
12.2 Final Inspection and Touch-ups
A thorough final inspection ensures all cedar shakes are securely fastened and properly aligned; Check for gaps, lifted edges, or uneven layers. Inspect valleys and ridges for tight seals. Touch up any damaged shakes by replacing or repairing them. Apply weatherproofing treatments to enhance durability. Ensure flashing is securely sealed around vents and chimneys. Verify that all nails are correctly positioned and countersunk. Address any areas where water might infiltrate. A meticulous inspection guarantees a long-lasting, weather-tight roof. Document findings for future maintenance reference.
Maintenance and Repair
Regularly inspect for damage, rot, or loose shakes. Clean debris to ensure proper drainage. Repair or replace damaged shakes promptly to prevent further issues. Apply weatherproofing treatments as needed to maintain durability and appearance. Address any leaks or gaps to preserve the roof’s integrity. Schedule annual inspections to extend the lifespan of your cedar shake roof.
13.1 Regular Maintenance Tips
Regular maintenance is essential to extend the life of your cedar shake roof. Inspect the roof annually for damaged, loose, or rotten shakes. Clean debris like leaves and branches to ensure proper water flow. Check for signs of rot or mold and address them promptly. Trim nearby tree branches to prevent damage from falling limbs. Apply weatherproofing treatments periodically to protect the wood. Ensure gutters are clear to avoid water backup. Address any mildew or moss growth before it spreads. Regular care helps maintain the roof’s structural integrity and aesthetic appeal.
13.2 Common Repairs for Cedar Shake Roofs
Cedar shake roofs often require repairs due to weathering, rot, or pest damage. Replace split or cracked shakes promptly to prevent leaks. Check for gaps between shakes and re-nail if necessary. Address rot by replacing affected shakes and treating the area with a wood preservative. Inspect and repair flashing around vents and chimneys to ensure watertight seals. Fix curled or buckled shakes by reattaching them securely. Regularly inspect for pest damage and treat infestations early to avoid costly repairs. Timely fixes prevent minor issues from becoming major problems.

Cost Considerations
Cedar shake installation costs vary based on materials, labor, and location. Budgeting upfront ensures affordability and avoids unexpected expenses during the project.
14.1 Budgeting for Materials
Budgeting for cedar shake materials involves calculating costs for shakes, underlayment, battens, nails, and flashing. Prices vary based on cedar type, quality, and brand. High-grade cedar shakes are more expensive but durable. Estimate material quantities accurately to avoid shortages or excess. Compare supplier prices and consider bulk purchases for discounts. Additionally, factor in the cost of optional materials like weatherproofing treatments. Planning your budget ensures a smooth installation process without financial setbacks. Allocate funds wisely to balance quality and affordability for long-term satisfaction.
14.2 Labor Costs and Time Estimates
Labor costs for cedar shake installation vary based on roof complexity, size, and installer expertise. Experienced professionals charge higher rates but ensure quality workmanship. A small roof may take 1-2 weeks, while larger projects require 3-4 weeks or more. Detailed work, like valleys and ridges, increases time and cost. Plan for additional labor if repairs or custom cuts are needed. For precise estimates, consult local contractors to assess your project’s specifics, ensuring a balance between cost and craftsmanship.
Cedar shake installation requires skill and attention to detail but offers lasting beauty and durability. Proper techniques ensure a weather-tight, long-lasting roof, enhancing your home’s charm and value.
15.1 Final Thoughts on Cedar Shake Installation
Installing cedar shakes requires patience and skill, but the result is a stunning, durable roof. Proper techniques ensure longevity, while regular maintenance preserves its natural beauty. Cedar shakes offer a unique aesthetic and environmental benefits, making them a worthwhile investment for homeowners willing to commit to their care. With proper installation and upkeep, a cedar shake roof can last decades, providing both protection and charm to your home.