
Honeywell T4 Pro Programmable Thermostat Installation Overview
The Honeywell T4 Pro Programmable Thermostat installation manual provides a comprehensive guide for smooth setup. It covers pre-installation checks, wiring diagrams, and mounting procedures to ensure compatibility with various HVAC systems. The manual also includes detailed steps for system configuration, troubleshooting common issues, and optimizing thermostat performance for efficient temperature control.
1.1 Pre-Installation Checks
Before installing the Honeywell T4 Pro Programmable Thermostat, ensure compatibility with your HVAC system. Verify the thermostat’s voltage requirements and check existing wiring for proper connections. Turn off power to the system at the circuit breaker. Confirm the thermostat’s compatibility with your heating and cooling stages. Review the wiring diagram to ensure all terminals match your system. Check for any additional accessories needed, such as the UWP mounting system. Ensure the thermostat is suitable for your specific HVAC configuration to avoid installation issues.
1.2 Wiring Diagrams and Requirements
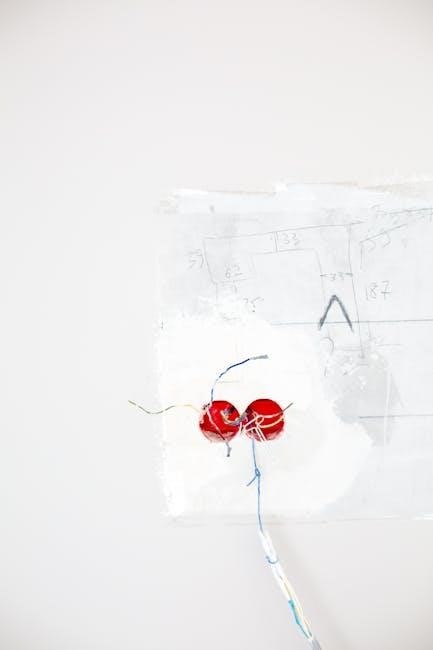
The Honeywell T4 Pro Programmable Thermostat requires precise wiring to ensure proper functionality. Refer to the wiring diagram in the manual to connect terminals correctly. For a 1H/1C system, connect Y to the compressor, W to the heating relay, and G to the fan relay. Ensure R and Rc terminals are configured using the slider tab. The UWP mounting system simplifies wiring by providing a universal interface. Verify compatibility of existing wires with the thermostat’s requirements to avoid installation issues. Always turn off power before starting the wiring process to ensure safety and prevent system damage.
T4 Pro Thermostat Package Contents
The Honeywell T4 Pro Programmable Thermostat package includes the thermostat unit, UWP mounting system, installation adapter, decorative cover plate, screws, anchors, 2 AA batteries, and instructions.
2.1 Included Components
The Honeywell T4 Pro Programmable Thermostat package contains essential components for installation and operation. These include the T4 Pro Thermostat unit, a Universal Mounting Plate (UWP) for easy wall installation, a Honeywell Standard Installation Adapter to ensure compatibility with existing systems, and a decorative cover plate to enhance the appearance. Additionally, the package provides screws and anchors for secure mounting, 2 AA batteries for initial power, and a detailed installation manual to guide the setup process. These components ensure a seamless and efficient installation experience.
2.2 Optional Accessories
Optional accessories for the Honeywell T4 Pro Programmable Thermostat enhance functionality and customization. A decorative cover plate in various sizes is available to match different home decors. Additional adapters, such as the J-box adapter, ensure compatibility with specific wall configurations. Extra screws and anchors provide flexibility for unique installation needs. These accessories allow users to tailor the thermostat setup to their preferences, ensuring a professional and polished appearance without compromising performance. They are recommended for installations requiring extra support or aesthetic adjustments.
Wiring and Electrical Connections
The Honeywell T4 Pro supports UWP wiring and conventional systems, ensuring compatibility with forced air and hydronic setups. Proper connections are vital for safe and efficient operation.
3.1 UWP Wiring Terminal Designations
The UWP wiring system simplifies connections with designated terminals for heating, cooling, and fan controls. Proper terminal assignments ensure correct system operation and prevent installation errors. Adhere strictly to the provided wiring diagram in the manual to avoid issues. Each terminal is clearly labeled for specific functions, such as Y for compressors, W for heating, and G for fans. This streamlined approach reduces complexity for installers, ensuring compatibility with various HVAC configurations. Always verify connections before powering up the system to guarantee safety and functionality.
3.2 Conventional System Wiring (Forced Air and Hydronics)
For conventional systems, the T4 Pro supports both forced air and hydronic configurations. Connect the Y terminal to the compressor contactor and W to the heating relay. The G terminal controls the fan relay. Ensure the R and Rc terminals are configured correctly using the slider tab, accommodating one or two R wires. Follow the wiring diagram for proper connections, ensuring compatibility with your specific HVAC setup. This configuration ensures efficient operation and precise temperature control for both heating and cooling systems.
Mounting and Setup
The T4 Pro features a Universal Mounting System (UWP) for easy installation on any wall. Use the included J-box adapter for compatibility with standard wall boxes. Follow on-screen instructions for setup, ensuring proper alignment and secure mounting; The thermostat comes pre-installed with 2 AA batteries, simplifying the initial setup process.
4.1 Thermostat Mounting Procedures
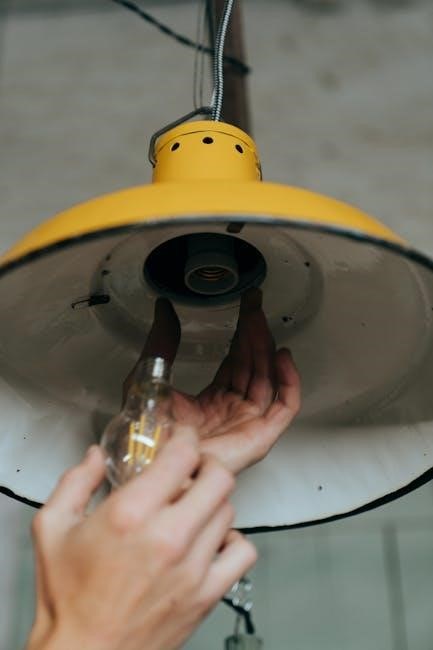
Mounting the Honeywell T4 Pro Thermostat involves securing the wallplate to a standard J-box using the provided screws and anchors. Detach the thermostat from the wallplate and open the terminal cover. Connect the wires according to the wiring diagram, ensuring proper alignment with the terminal designations. Once wired, reattach the thermostat to the wallplate, ensuring it clicks firmly into place. Use a level to confirm the thermostat is straight. Finally, insert the two AA batteries to power the device, completing the mounting process efficiently.
4.2 Installer Setup (ISU) Configuration
After mounting, access the Installer Setup (ISU) mode by pressing and holding the menu button. Follow on-screen instructions to configure system settings, such as HVAC type and wiring verification. Select the appropriate heat and cool stages, ensuring compatibility with your system. The ISU mode also allows setting temperature limits and fan operation. Once configured, the thermostat transitions to the home screen, ready for user interaction and scheduling. Proper ISU setup ensures optimal performance and compatibility with your HVAC system.
System Configuration and Programming
Configure heating and cooling stages, set temperature preferences, and program schedules. The thermostat learns system behavior for optimal performance, ensuring efficient temperature control and energy savings.
5.1 Setting Up Heating and Cooling Stages
Configure heating and cooling stages based on your HVAC system type. For a 1H/1C system, set the heating and cooling stages to 1. For a 2H/1C system, enable two heating stages. Access the Installer Setup (ISU) menu to select the correct configuration. Adjust parameters like heat and cool differentials to optimize performance. Ensure proper wiring connections for stage control, such as W2 for second-stage heating. Refer to the wiring diagram in the manual for accurate setup. Proper stage configuration ensures efficient operation and precise temperature control.
5.2 Programming Schedule and Preferences
Program the Honeywell T4 Pro with a custom schedule to match your daily routine. Set temperature preferences for wake, leave, return, and sleep periods. Choose between 7-day, 5-2, or 5-1-1 schedules. Adjust heat and cool setpoints to optimize comfort and energy savings. Enable features like geofencing or smart recovery to enhance performance. Set preferences for hold duration, temperature offset, and backlight settings. Use the on-screen menu to input your schedule and preferences, ensuring your system operates efficiently based on your lifestyle. Refer to the manual for detailed step-by-step instructions.
Advanced Features and Settings
The Honeywell T4 Pro features advanced settings like the Universal Mounting System (UWP) and a learning algorithm for optimal performance. Custom settings include backlight control and geofencing.
6.1 Universal Mounting System (UWP)
The Universal Mounting System (UWP) offers flexibility and convenience during installation. It ensures compatibility with various wall configurations and existing wiring setups; UWP features a sleek, compact design that simplifies mounting, reducing the need for additional adapters. This system supports both standard and decorative cover plates, allowing for a seamless integration into any home decor. The UWP also includes a J-box adapter for secure and stable installation, ensuring the thermostat remains level and firmly attached to the wall.
6.2 Learning Algorithm for Optimal Performance
The Honeywell T4 Pro features a learning algorithm that adapts to your system’s behavior, optimizing heating and cooling cycles. It learns how long it takes to reach desired temperatures, adjusting operations for efficiency. This intelligent feature minimizes energy waste and ensures consistent comfort. Over time, the thermostat fine-tunes its performance based on your system’s response, providing personalized climate control. The learning algorithm also integrates with smart features like geofencing and smart recovery, enhancing overall system performance and user experience.
Technical Specifications
The Honeywell T4 Pro supports 24-230V systems, with a temperature range of 32°F to 90°F (0°C to 32°C). The display features a high-resolution touchscreen interface for precise control and easy navigation, ensuring optimal performance and user convenience.
7.1 Electrical Ratings and Compatibility
The Honeywell T4 Pro Programmable Thermostat operates on a 24-230V power supply, ensuring compatibility with a wide range of HVAC systems. It supports systems requiring 2-pipe or 4-pipe configurations, including gas boilers, combi-boilers, and zone valves. The thermostat is not compatible with 230V electric heating systems. It features a temperature range of 32°F to 90°F (0°C to 32°C) and requires 2 AA batteries for backup power. This versatility makes it suitable for various residential and light commercial applications, providing reliable performance across different electrical setups.
7.2 Display Settings and Temperature Offset
The Honeywell T4 Pro Thermostat offers customizable display settings and temperature offset adjustments. Users can configure the backlight brightness in five levels and choose between 12 or 24-hour clock formats. The temperature offset allows adjustments from -3 to 3°F (-1.5 to 1.5°C) to ensure accuracy. The display also features a daylight saving time option and maintains consistency between the displayed and actual room temperature. These settings enhance user experience and ensure precise temperature control, providing comfort and efficiency in heating and cooling systems.
Troubleshooting Common Issues
Common issues include wiring problems, display malfunctions, or system errors. Check connections, ensure proper configuration, and refer to the Honeywell T4 manual or support guides for solutions.
8;1 Identifying and Resolving Wiring Issues
Wiring issues are common during Honeywell T4 Pro installations. Check for loose connections, incorrect terminal assignments, or damaged wires. Verify Y, W, G, R, and Rc configurations. Ensure proper use of the slider tab for single or dual R wires. Consult the wiring diagram in the manual. If the display shows errors, re-examine connections. Power down the system before troubleshooting. Use the Installer Setup (ISU) mode to test wiring configurations. If issues persist, refer to the Honeywell T4 installation guide or contact a certified technician for assistance.
8.2 Addressing Installation-Related Errors
Installation-related errors can often be resolved by reviewing the setup process. Ensure the thermostat is properly mounted and powered. Check for misconfigured Installer Setup (ISU) settings, such as incorrect system type or stage configuration. Verify that the heating and cooling stages match your HVAC system. If the thermostat displays error codes, consult the manual for troubleshooting steps. Common issues include incorrect wiring, low battery, or mismatched system settings. Restart the thermostat after addressing errors. If problems persist, refer to the Honeywell T4 installation guide or contact a certified technician for further assistance.
Support and Resources
Access comprehensive support resources for the Honeywell T4 Pro Thermostat.
Download the installation manual, guides, and videos. Visit the official website for live chat, troubleshooting, and contact information.
9.1 Downloading the Honeywell T4 Installation Manual PDF
To download the Honeywell T4 Pro Programmable Thermostat installation manual, visit the official Honeywell Home website. Navigate to the support section and search for the T4 Pro model. Select the appropriate PDF manual, which includes detailed installation steps, wiring diagrams, and troubleshooting tips. Ensure you download the correct version for your specific thermostat model. The manual is essential for understanding pre-installation checks, system compatibility, and advanced features like the Universal Mounting System (UWP). Refer to it for precise guidance during setup and configuration.
9.2 Accessing Additional Guides and Videos
Beyond the manual, Honeywell offers supplementary resources to aid T4 Pro installation. Visit their official website or support portal for instructional videos, FAQs, and troubleshooting guides. These resources provide step-by-step visual aids and answers to common questions, ensuring a smoother setup process. Additionally, Honeywell’s customer support team is available for live chat assistance, offering personalized help for complex installation scenarios. These materials complement the manual, enhancing your understanding of features like the learning algorithm and UWP mounting system.